Ok workin' for real now on the full sized Twig Theatre! Flickering Lanterns taking shape!
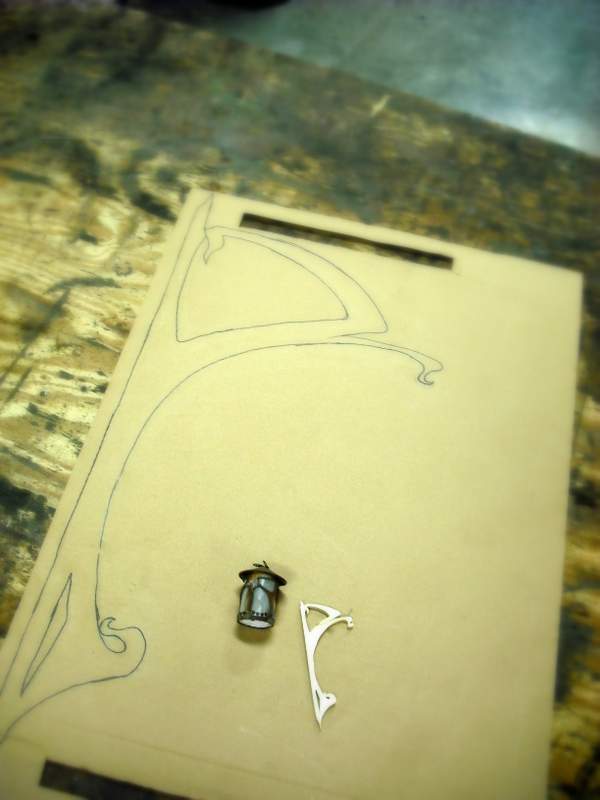
I started by drawing out the lantern pattern in several different sizes. I really wanted to play with different sizes and placing them next to the theatre to see how it all looked. Can't make assumptions that it will look good just because it looked good on the miniature model (I would soon learn!)
Papa bear was a little too big!
Baby bear was a little too small!
But Mama bear was juuuuuuust right!
I traced out the full sized bracket on a piece of cardboard . Then hot glued it with hinges onto the side of the theatre so I could look at the bracket and lantern together.
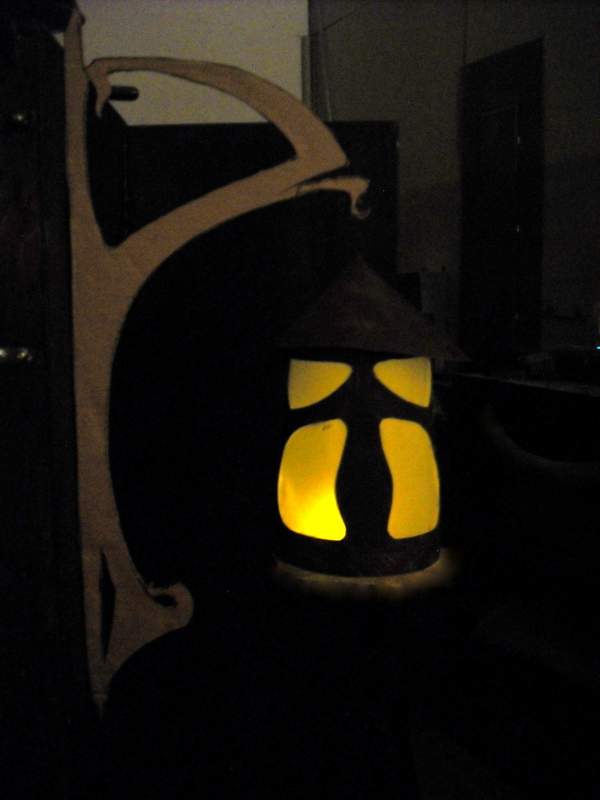
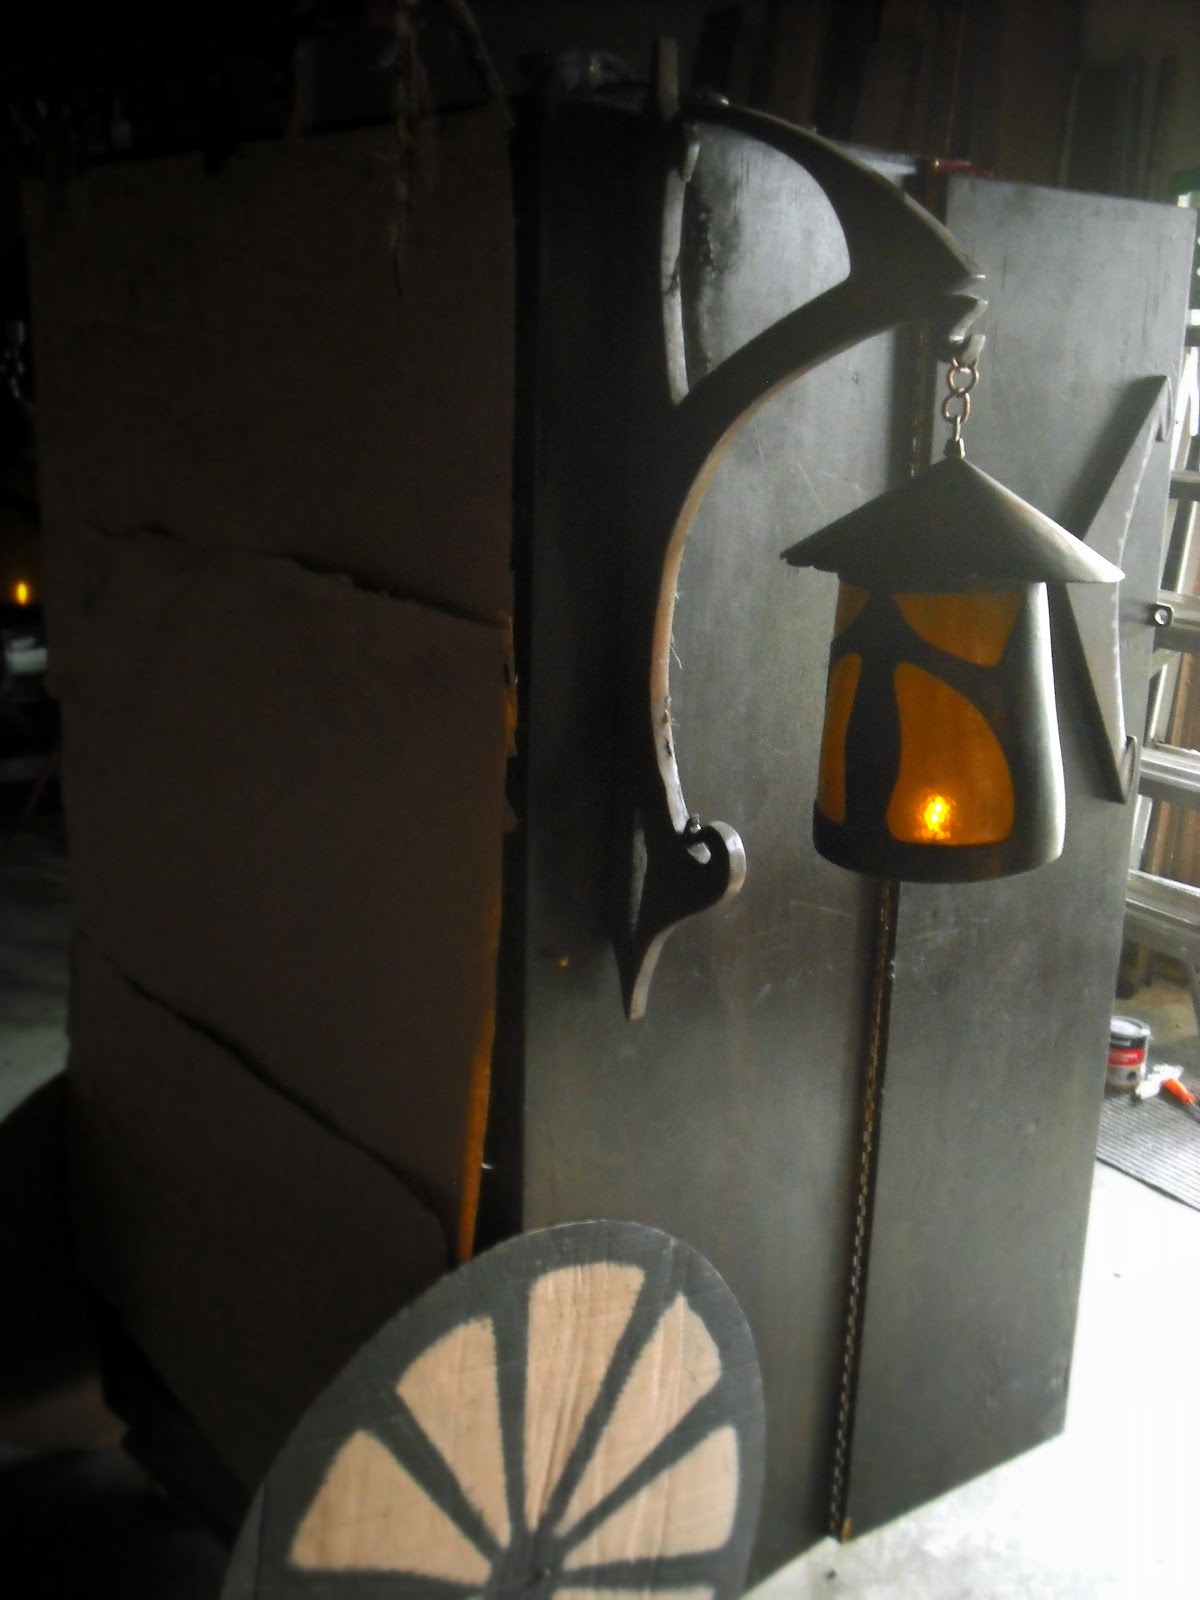
Here's how they look together!
whoa pretty magical....it's got that look I want! Don't always know exactly what that is....but when I see it- I know it. Immediately!
Funny thing happens...I am learning....when you try to recreate something you have built in miniature. It doesn't always look as cute or as "magical" as it did when it was small. So, the first lantern mock-up I made (papa bear) was a close replica of the miniature model lantern and I did not like it at all. Two things were disagreeable about this mock-up....it was way too large AND it looked too "straight", or not animated enough I shall say. So I tried smaller and then I tried in between. This middle lantern actually did something funny... it looks like the glass windows are "blowing out" . It made it look somewhat animated and that was it! Thats what it needed!
So, after discussing the various conditions these lanterns may have to endure we decided that fiberglass lanterns would be the best material to use. This would allow flexibilty in design, as well as durability. I anticipate constant packing and unpacking, moisture, UV light, kids tugging and pulling on them.
The only other material that seemed practical would be to actually pound and shape metal into lanterns....maybe later!
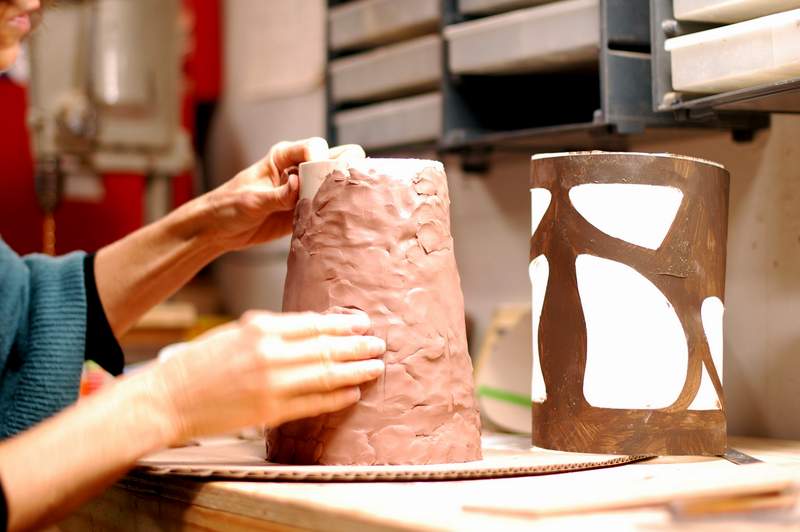
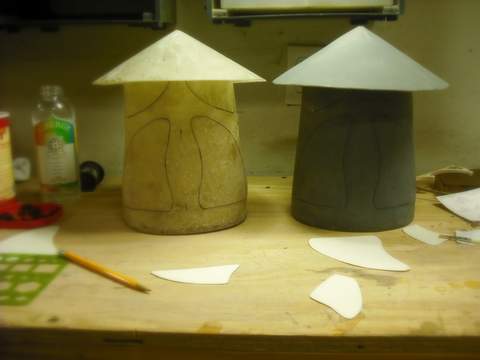
So, the next step was to sculpt the shape that we would fiberglass on top of. I started with a 4 inch pvc tube and bulked the clay out around this shape.
I am staying with some friends (John and Annette) while I am working on this project and this workshop is right across from my room! Are you kidding!!?? if I get the urge to make a puppet in the middle of the night... there's that conspiring universe again!
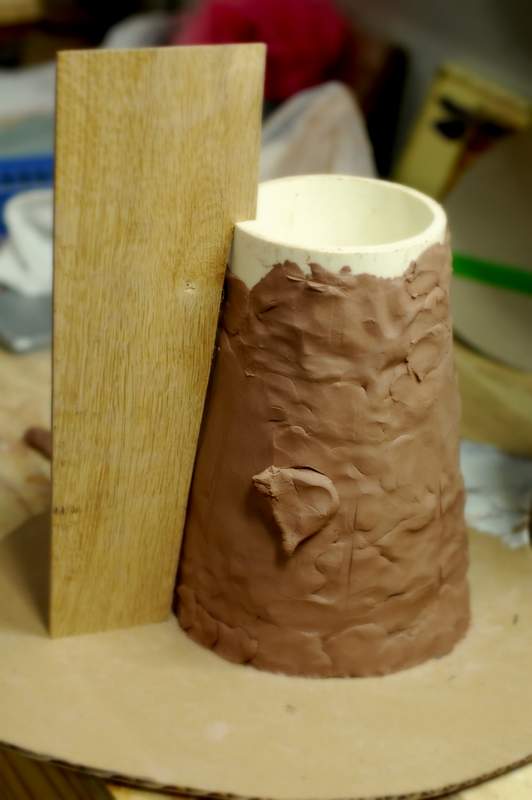
This nifty little wood gadget allowed me to make sure the slope around the pipe stayed consistent! John's idea! ...I love such things!
And then I eventually pulled away from that nifty wood gadget as I tried to make the sculpt match my model.
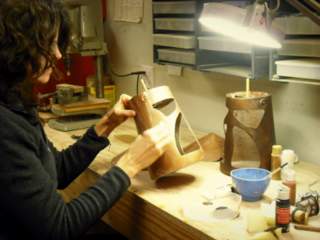
ok! ready to be fiberglassed! John had some fiberglass 'roll' left over from a tractor roof he repaired so there was no extra purchase to make this happen.
The sculpt was covered in saran wrap and then waxed
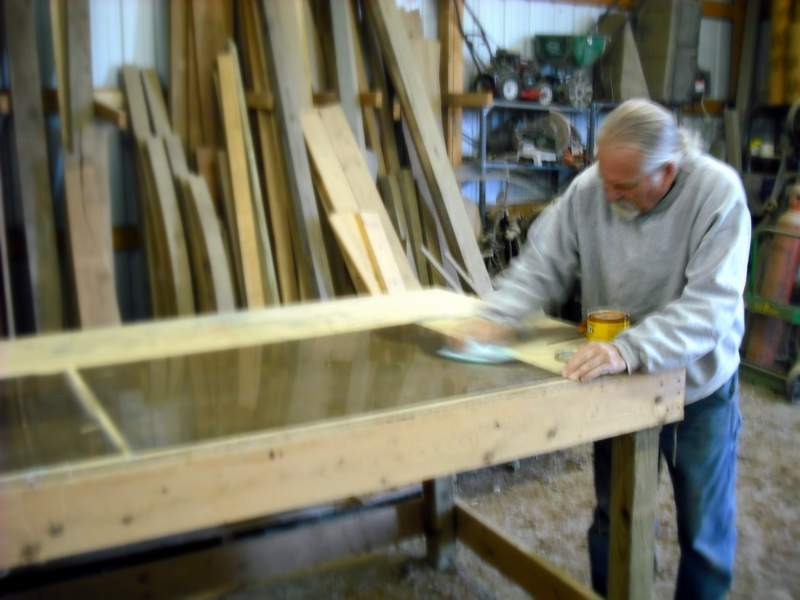
Then, down to the barn for the icky part!! John prepping...putting wax on some plexiglass.
My first time fiberglassing!!! Johns' showin' me the ropes
I put a wrap sheet of fiberglass around the sculpt and then dab the resin on it with a brush till it is soaked in. Multiple sheets were applied (4 I think) and then a day or so later the resin is hard enough to sand.
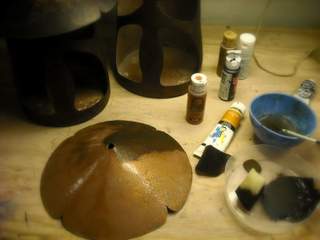
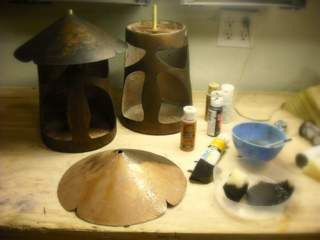
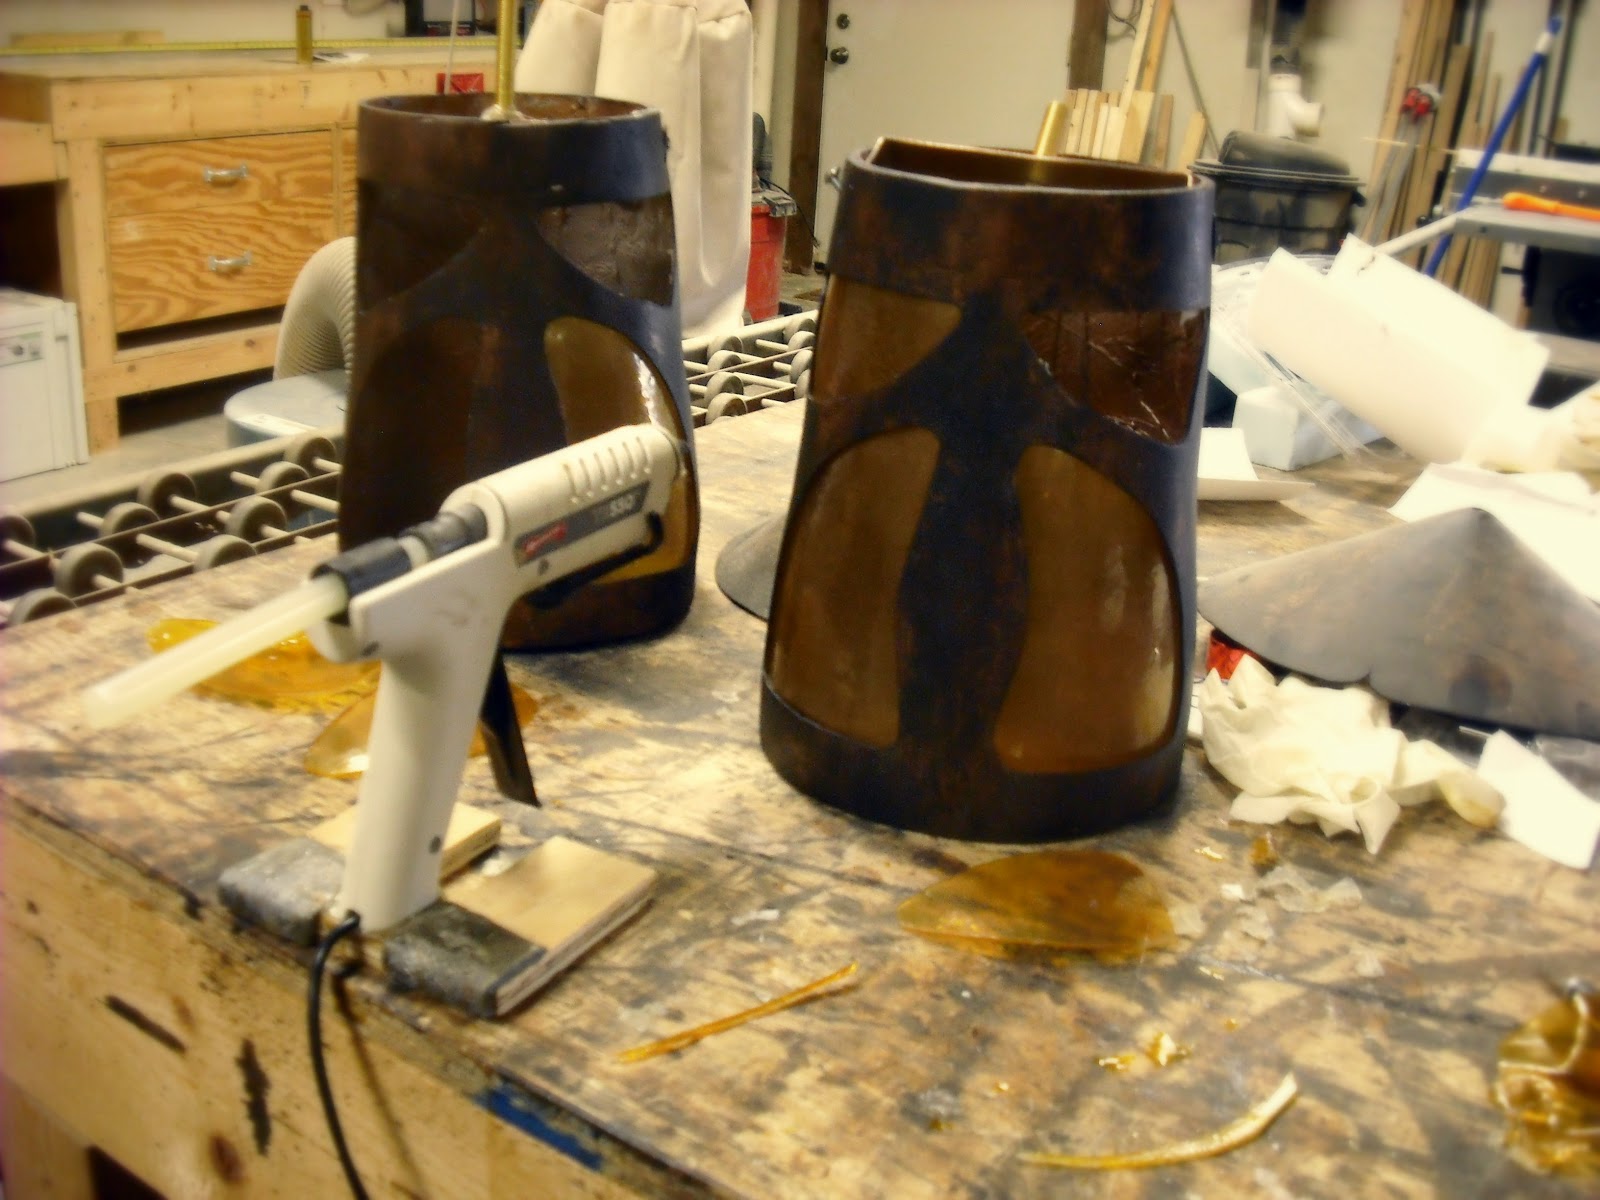
The first lantern is done and the two things to the right will be the bottom for both lanterns. Lastly we will work on the Lantern tops.
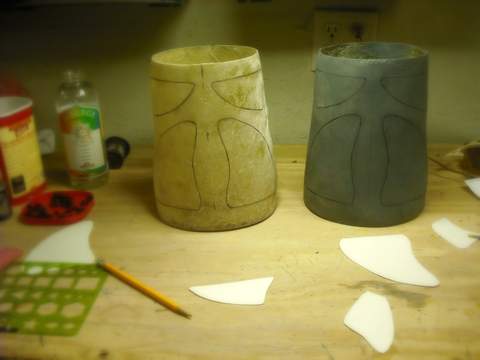
From this point I remove from the clay buck from inside and it is a hollow tube....then sand it, cut out the windows and paint.
Trimming one of the fiberglassed lantern tops on a scroll saw
The lanterns after sanding down to a relatively smooth surface...I like some roughness...keeps that homemade feel. Hard to believe this was that blob tower above!
Playing with the window shapes
window shapes dremeled out! Hmm, I like!
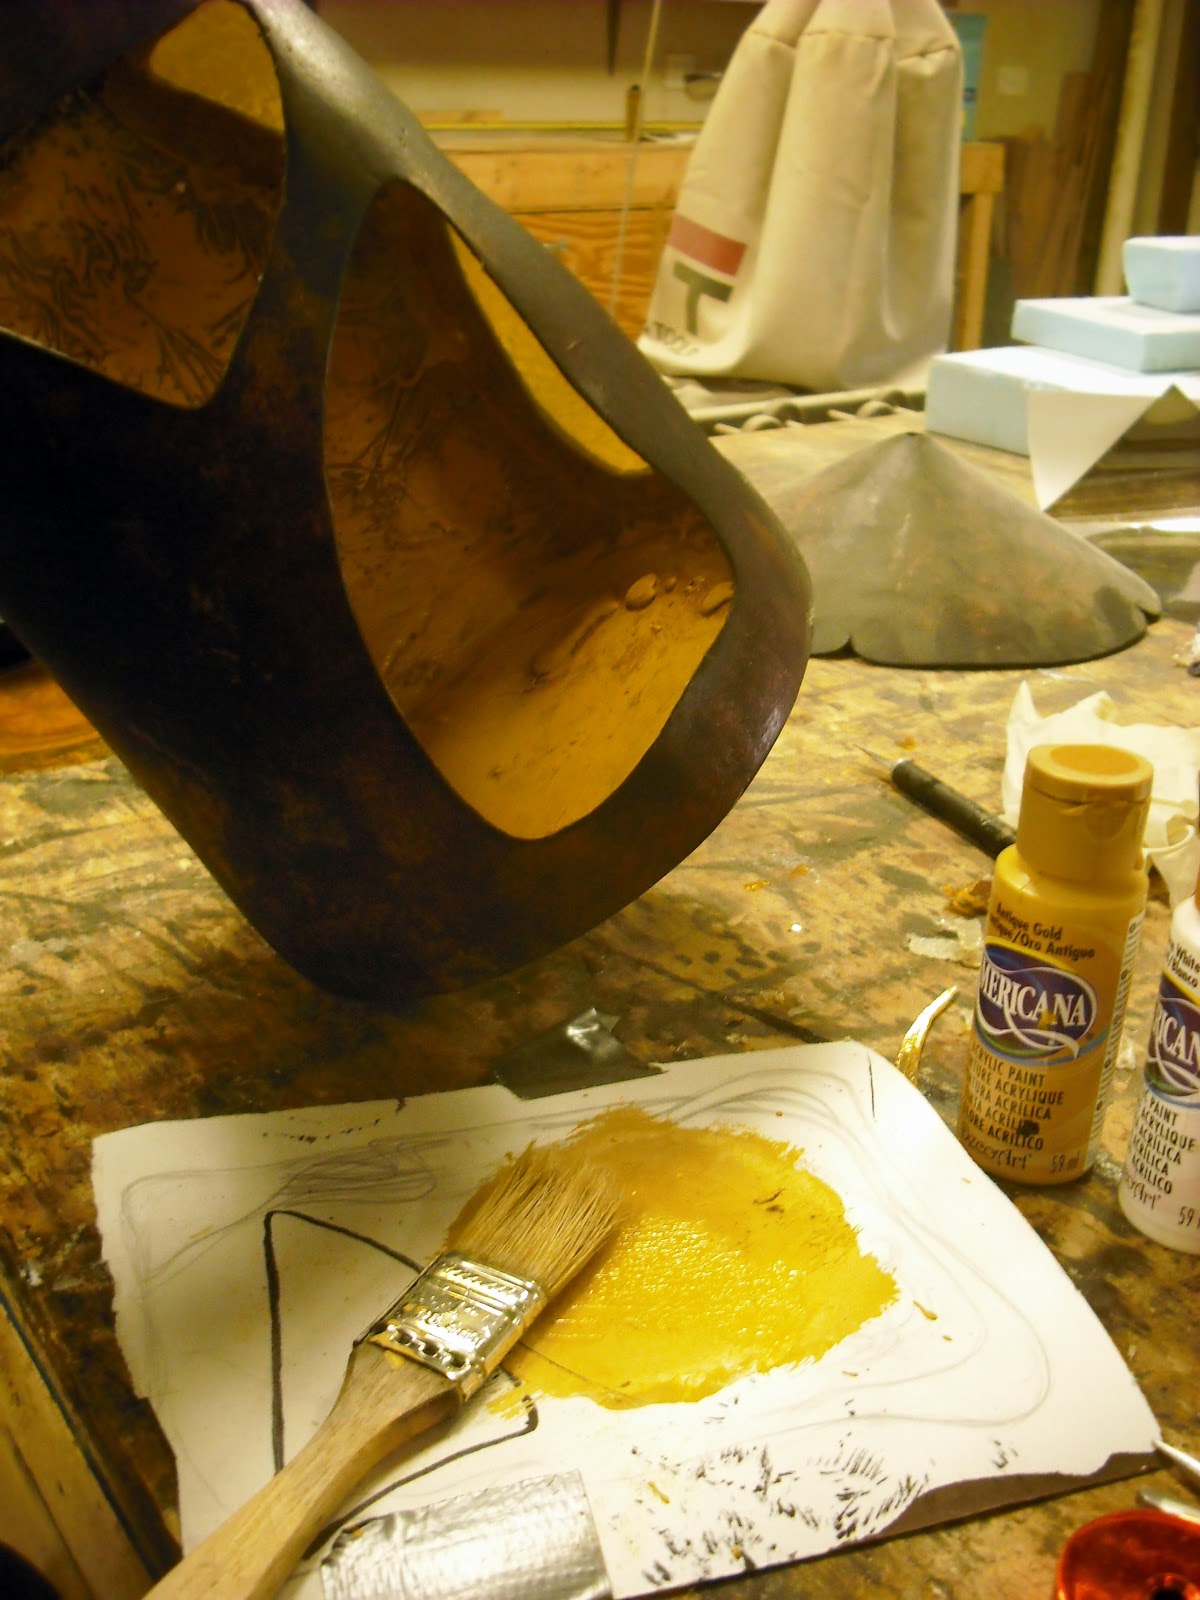
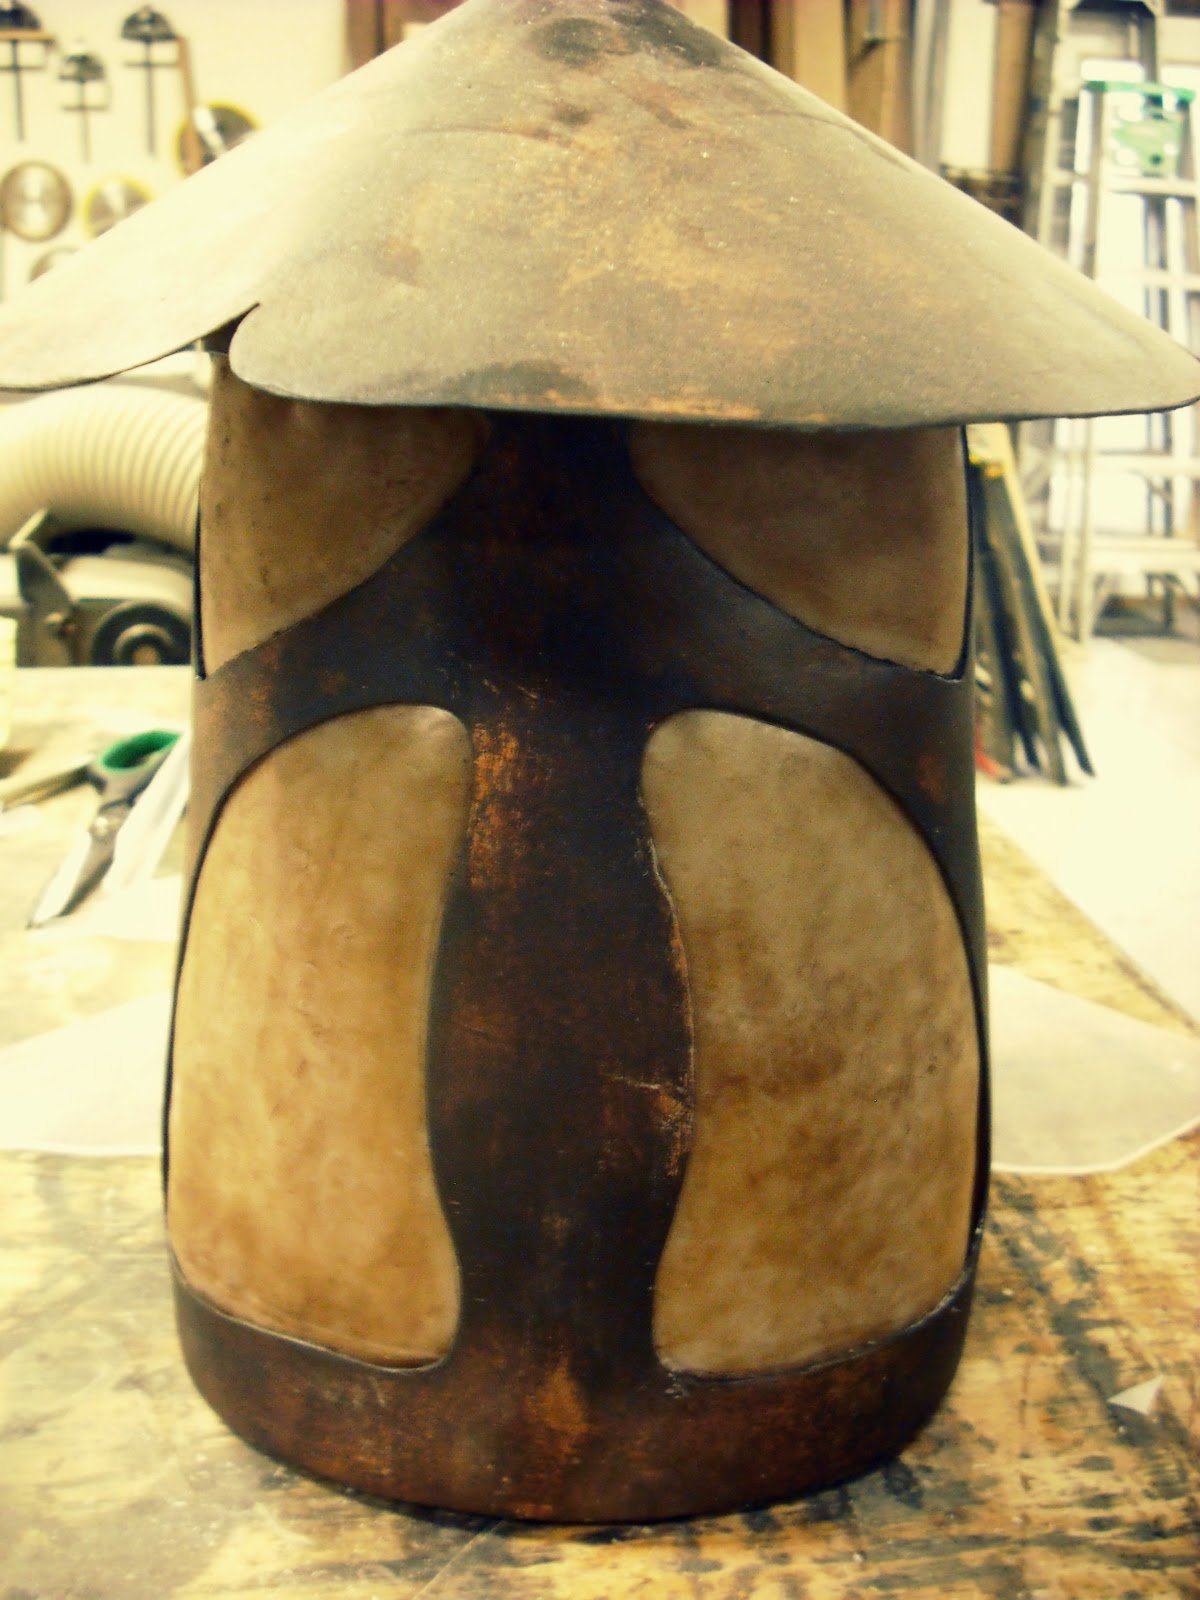
Here is the first coat of paint ...hammered copper spraypaint. The paint actually looks like it dimples after you sparay....very cool. Home Depot thing.
Although the spray is a neat effect it is too shiny and doesn't look entirely real so it acted as a basecoat and I added some dark acrylics on top.
Black and Brown ...to age it
Before the paint dried completely I rubbed some of it off.....
And this is what happened! wow...I love it. Totally blew my plans to add green and rust colored copper streaking....it just looks so good this way I think I will leave it. I love cool discoveries and "mistakes"
Will update as soon as I have the window panes completed...almost done!
Painting the inside yellow for higher reflectance...
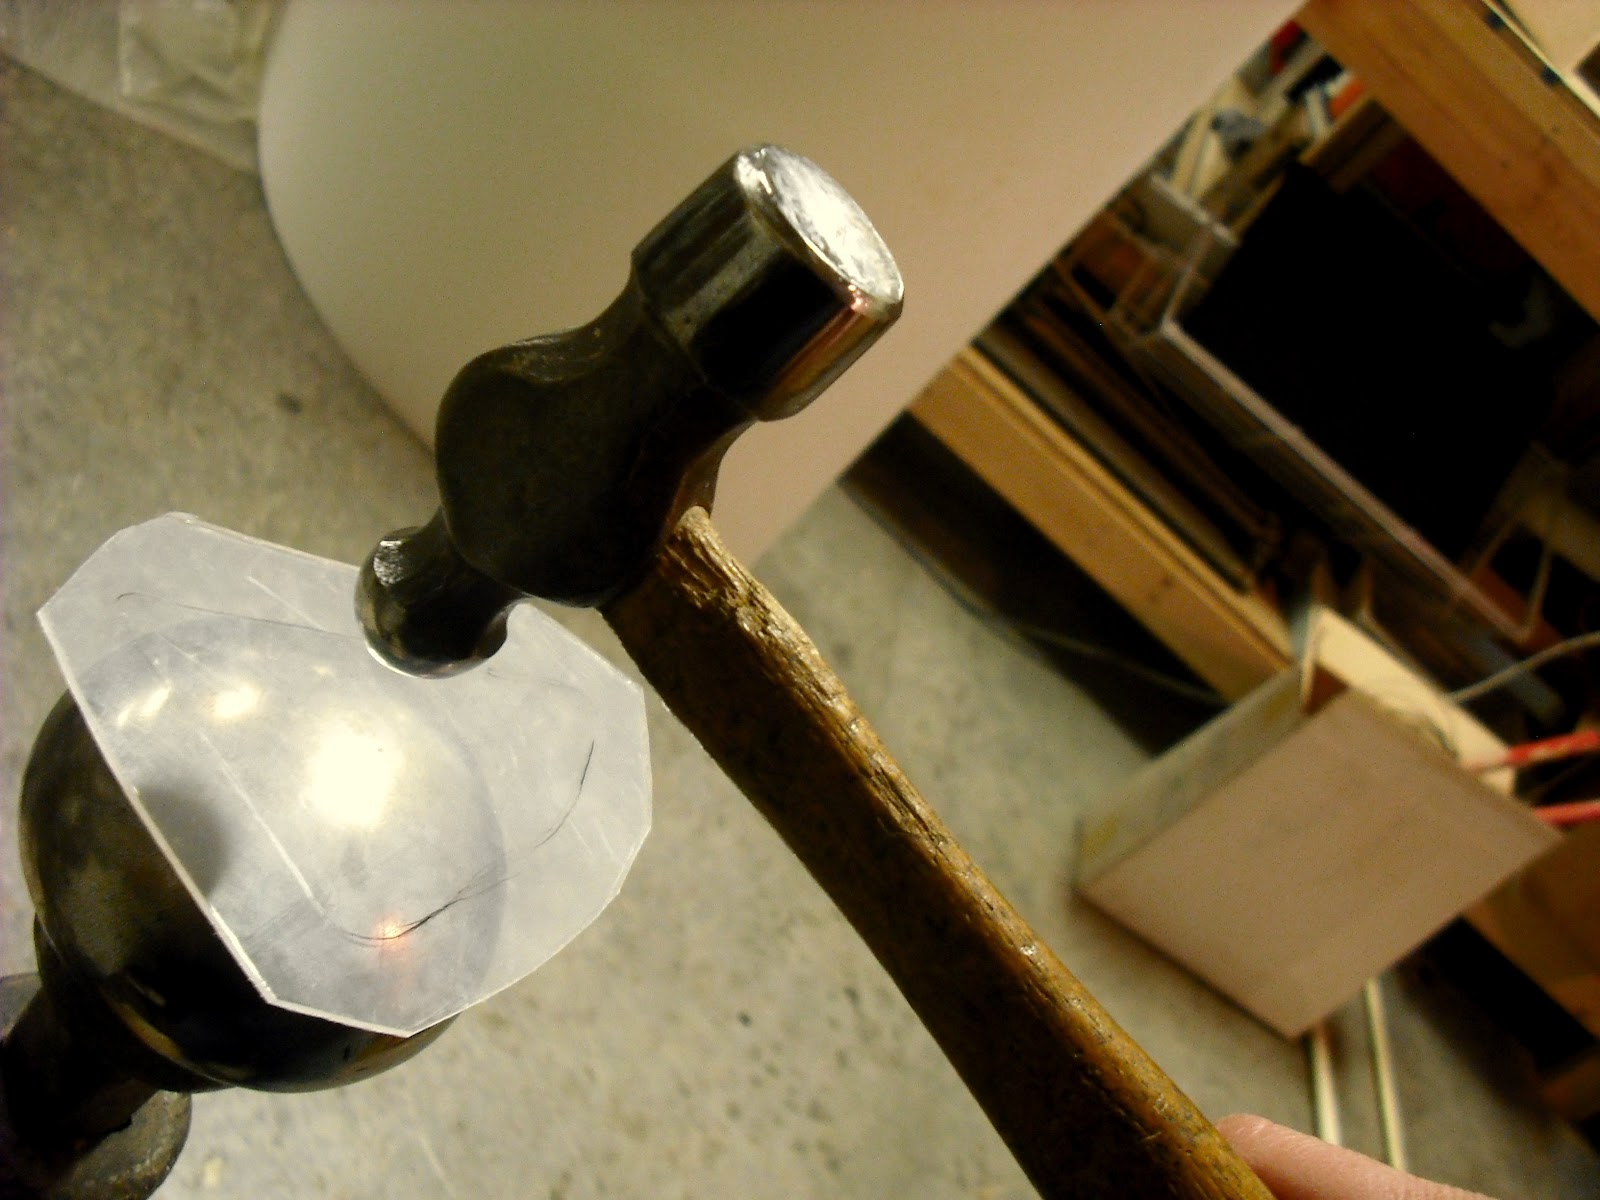
Now here is the first attempt at window panes....it is milk jug plastic pounded with a hammer and then the shapes are hot-glued into the lantern. This looked great in the dark with candles glowing on the inside, however I did not like the look of it in the daylight...the panes are too opaque and don't match the vision I had. I DO however like the pounded plastic.
SO, I decided I would try the hammered plastic but I would use a clearer plastic. Here is a plastic storage container I had on hand.
I cut out the bottom
Then drew the window shapes and roughly cut them out
Then I pounded them on a rounded anvil (I used a heat gun to soften the plastic slightly) and this is what I got....
Pretty cool huh?
Here are the window shapes all pounded. When the hammer hits the plastic it smashes it, in essence spreading it out, stretching it into a nice curved piece. A perfect result for my needs.
I decided that the panes were to milky colored, so I slapped some orange shellac on the inside of the pane and vwalla! Takes the milkiness right out. I think they look mavelous!
Looks like some kind of leaded amber glass! Just as I had envisioned.
Old pane on right with new panes. much better!

The shellac crazed on one of the panes. It was so beautiful I just left it.
oops...my glue gun caught the corner and the shellac peeled off like a fruit roll up. Thank goodness the shellac is on the inside of the lanterns where there will be no prying fingers! Hopefully the heat/sun won't make them peel...fingers crossed!
Glueing them in. yay for glue guns!
The light shining through...
miniature lanterns and lifesize replicas

miniature theatre
Full-sized theatre!
The cart is coming along quite nicely! And the lanterns are a magical addition.
Brackets (for lanterns)
This is a large cherry board John had in the workshop. John just built a house so he has many materials I have been able to use.
band saw and scroll saw cut
Then I went in and filed down all the corners and tricky spots I couldn't reach with a sander.


I actually used an ebony stain on this cherry and it turned out a nice brown with darker in the cracks. nice effect
mounted on the theatre
they are hinged and fold down
this is the audience side ...I will create some type of Twig logo to go on the panel on this side